What is a 4 Jaw Chuck?
A 4 jaw chuck is an essential tool for precision machining, commonly used in turning operations. Its primary role is to hold workpieces securely on a lathe during cutting, drilling, or milling operations. Unlike self-centering 3 jaw chucks, the 4 jaw chuck offers increased flexibility and accuracy, making it the go-to solution for tasks requiring complex setups or handling irregularly shaped components.
In this article, we’ll explore everything you need to know about 4 jaw chucks, from how they work to their advantages, and practical tips for setup, maintenance, and safety.

Understanding the Basics of a 4 Jaw Chuck
Before diving into how to use a 4 jaw chuck, it’s essential to understand its basic structure. A 4 jaw chuck consists of four separate jaws, each capable of being adjusted independently. This allows machinists to grip parts with precision, no matter their shape or size.
The structure of 4 Jaw Chuck
How a 4 Jaw Chuck Differs from a 3 Jaw Chuck
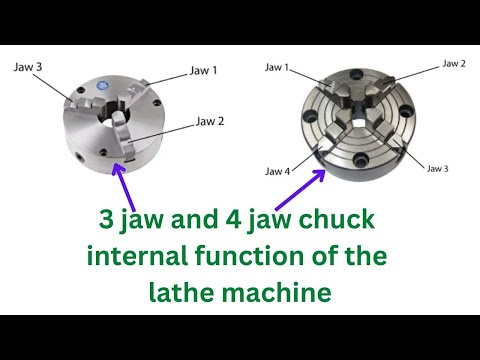
A 3 jaw chuck is the most common type of lathe chuck. The key difference between a 3 jaw and 4 jaw chuck is how the jaws move. In a 3 jaw chuck, all jaws move together, making it ideal for symmetrical, round parts. However, this means that 3 jaw chucks are not as flexible when it comes to holding irregularly shaped workpieces.
In contrast, each jaw of a 4 jaw chuck moves independently. This means it can clamp down on parts with much more precision and flexibility. You can use a 4 jaw chuck to secure square, rectangular, and even irregularly shaped parts without worrying about alignment issues.
What Makes a 4 Jaw Chuck Unique?
The independent adjustment of each jaw is what sets the 4 jaw chuck apart from other types. This feature allows for precise centering and secure clamping of non-circular workpieces. Whether you're dealing with a cam, a flat surface, or an off-center turning task, the 4 jaw chuck provides the versatility needed to achieve high-quality results.
How Does a 4 Jaw Chuck Work?
The 4 jaw chuck is a simple yet precise mechanism. It functions by gripping the workpiece through four adjustable jaws that are housed in T-slots or dovetail grooves. These grooves allow the jaws to move smoothly along their path when adjusted by turning a screw with a chuck key.
The Mechanical Design of a 4 Jaw Chuck
The chuck body houses four movable jaws, each of which is driven by a dedicated screw. When the screw is turned, the jaw moves either in or out, depending on whether the screw is pushing or pulling. This allows the machinist to control the exact positioning of the workpiece.
Jaw Movement and Adjustment
The ability to adjust each jaw independently is what makes the 4 jaw chuck so versatile. By turning each screw individually, the machinist can move each jaw independently, which allows for finer control and the ability to hold irregularly shaped parts securely.
How Each Jaw Is Adjusted Independently
When setting up a 4 jaw chuck, each jaw must be adjusted manually to ensure that the workpiece is positioned correctly. The process involves adjusting each jaw until the workpiece is centered or intentionally offset, depending on the specific machining task at hand.
Step-by-Step Guide to Using a 4 Jaw Chuck
To use a 4 jaw chuck effectively, start by loosely mounting the workpiece and rotating the chuck slowly. Use a dial indicator to check for any deviations in the part’s surface. Then, adjust each jaw gradually to bring the workpiece into proper alignment. This process may take several passes but is crucial for precision.
Benefits of Using a 4-Jaw Chuck in Machining
A 4-jaw chuck is a useful tool in machining for a number of reasons. It stands out for its precision, flexibility, and ability to handle different shapes and complex tasks.
1. Precision and Flexibility
The 4-jaw chuck is known for its accuracy. Unlike other chucks, each of its jaws can be moved separately. This means you can carefully adjust and center the part you're working on, even if it's not perfectly round. This is especially important when the part has small imperfections or irregularities that need to be precisely aligned.
2. Clamping Irregular Parts
While a 3-jaw chuck is good for holding round or hexagonal parts, it can struggle with parts that are irregular in shape. The 4-jaw chuck solves this problem because it can hold square, rectangular, or other odd-shaped pieces securely. This is perfect for custom jobs or repairs where standard parts won’t work.
3. Handling Different Shapes
The ability to move each jaw independently is one of the 4-jaw chuck's biggest advantages. This makes it great for parts of any shape—whether it’s a custom part or a damaged piece that needs work. The 4-jaw chuck holds everything firmly, giving you more control over your machining.
4. Supporting Eccentric and Off-Center Turning
Sometimes, you need to machine parts that are deliberately off-center, like when creating cam profiles or other complex shapes. The 4-jaw chuck makes this easier. By allowing you to adjust the workpiece off-center, you can perform eccentric turning without needing extra fixtures or complicated setups.
5. Perfect for Cam Machining and Multi-Axis Work
In tasks like cam machining, where precision is crucial, the 4-jaw chuck is especially helpful. It allows the workpiece to be positioned exactly where it’s needed, even for multi-axis machining or creating custom profiles. This makes it a key tool in any complex machining process.
Setting Up a 4-Jaw Chuck: Tips for Better Accuracy
Getting your 4-jaw chuck set up correctly is key to getting good results with your machining. Here's how you can make the setup process easier and more accurate.
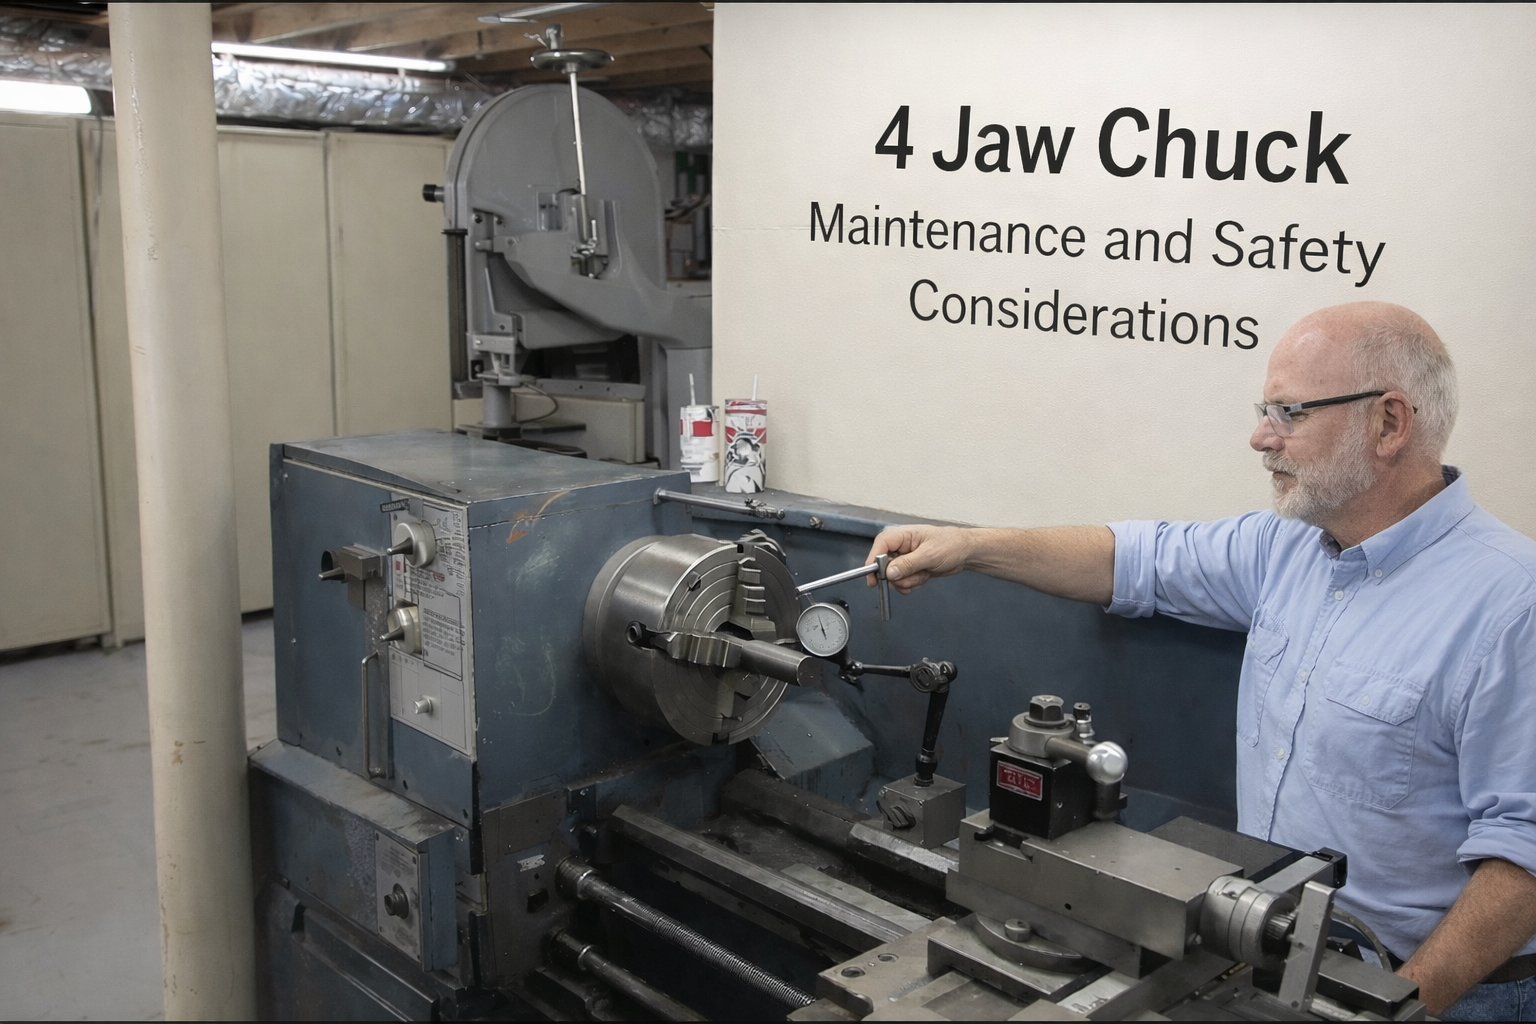
1. Using a Dial Indicator to Center Your Workpiece
A dial indicator is a tool that helps you measure how much the workpiece is off-center. This tool is important because it allows you to see exactly how far your piece is from the center and make small adjustments to get it perfectly centered.
2. Tightening the Jaws Slowly and Evenly
When you're tightening the jaws of the chuck, do it slowly and evenly. Don't just tighten one jaw all the way—tighten the jaws opposite each other a little bit at a time. This ensures that the pressure is balanced and your workpiece stays in the right position.
3. Why Even Pressure is Important
If you tighten the jaws unevenly, your workpiece might get pushed off-center. This can cause problems like wobbling or poor precision. To avoid this, always tighten the jaws alternately, slowly and evenly. This keeps the piece centered and ensures that it’s held securely.
4. Safety and Precautions During Setup
When setting up, always start by using low spindle speeds. This allows you to make adjustments safely. If something goes wrong, a slow speed makes it easier to stop quickly and avoid accidents. It also gives you time to check how well your workpiece is centered using the dial indicator.
5. Manual vs. CNC Lathe Setup
Setting up a manual lathe requires more hands-on work and careful adjustments. With a CNC lathe, some of the jaw positioning can be done automatically, but you still need to follow the same basic steps for making sure everything is aligned correctly.
Proper maintenance and safety practices are crucial for getting the best performance from a 4-jaw chuck and ensuring its longevity. Here's an overview of how to care for your 4-jaw chuck and important safety tips to keep in mind.
4-Jaw Chuck Maintenance
1. Regular Cleaning
Keeping the chuck clean is essential to maintain its performance. Dirt, chips, and oil can accumulate between the jaws and other parts of the chuck. Regular cleaning helps prevent any build-up that might affect its operation.
How to Do Regular Cleaning of a 4-Jaw Chuck
Regular cleaning of a 4-jaw chuck is important to keep it functioning properly and to prevent debris and dirt from affecting its performance. Here's a step-by-step guide on how to clean a 4-jaw chuck:
What You'll Need:
Step-by-Step Cleaning Process:
1. Turn Off the Machine and Ensure Safety
2. Remove the Chuck from the Lathe (If Necessary)
3. Brush Off Loose Debris
4. Clean the Jaws and Other Parts
5. Use Compressed Air (Optional)
6. Lubricate the Chuck (After Cleaning)
7. Check for Wear and Damage
8. Reassemble and Reattach (If Removed)
9. Test the Chuck
Tips for Ongoing Maintenance:
Avoiding Damage: Be careful not to use harsh chemicals or abrasive materials that could scratch or damage the chuck.
Avoid Harsh Chemicals: Always use mild cleaners and degreasers that are safe for the chuck material. Harsh chemicals can damage the finish or components.
Check Alignment: After cleaning, check the alignment of the jaws to make sure they’re moving properly. Misalignment can affect machining accuracy.
Keep it Dry: After cleaning, make sure the chuck is completely dry before lubricating or reattaching it to the machine.
Clean Regularly: Perform this cleaning process regularly, depending on how often the chuck is used. Regular maintenance will extend the life of the chuck and improve its performance.
After reattaching the chuck, run the lathe for a short time at low speed to ensure everything is working smoothly. Check that the jaws move freely and securely hold the workpiece. Look for any unusual vibrations or noises that could indicate a problem.
If you removed the chuck from the lathe for cleaning, carefully reassemble it and mount it back onto the spindle once it is dry and lubricated. Tighten the chuck securely but avoid overtightening.
While cleaning, take the opportunity to check the chuck and jaws for any signs of wear, cracks, or damage. This includes looking for any uneven surfaces on the jaws or any dents or chips. If you notice any issues, it may be time to replace or service the parts.
Once the chuck is clean and dry, it's important to lubricate the moving parts to prevent rust and ensure smooth operation.
Apply a small amount of light machine oil or a lubricant recommended by the manufacturer to the jaw slides and other moving components. Be careful not to over-lubricate, as excess oil can attract dust and dirt.
If available, you can use compressed air to blow out any fine particles or debris from tight areas, such as around the chuck body or in between the jaw slides. This can help clear areas that are hard to reach with a brush or cloth.
If the jaws have built-up grime or grease, you may need to use a mild machine cleaner or degreaser. Apply a small amount to a cloth or brush and gently scrub the jaws, ensuring you remove any old grease or debris.
Wipe the jaws down with a clean, dry cloth to remove excess cleaner and moisture. You don’t want any cleaning solution left on the chuck that could attract dust or cause rust.
Use a soft-bristle brush to gently remove any loose dirt, chips, or dust from the chuck, jaws, and body. Focus on the spaces between the jaws, the mounting area, and any grooves or crevices where dirt can accumulate.
Be sure to clean the jaw slides where they meet the chuck body. This will help ensure smooth jaw movement.
If the chuck needs more thorough cleaning, remove it from the lathe. Loosen and unscrew the chuck from the spindle using the appropriate tools. This is typically done using a chuck key.
Place the chuck on a clean surface or in a container to catch any small parts.
Power down the lathe and ensure it is completely off and unplugged before starting any cleaning work.
Wear safety gloves to protect your hands from any sharp edges on the chuck or debris.
Clean, lint-free cloths or rags
Soft-bristle brush (like a paintbrush or small wire brush)
Mild machine cleaner or degreaser (optional)
Light machine oil (for lubrication after cleaning)
Compressed air (optional for blowing out debris)
A container or tray (for collecting small parts, if disassembling)
2. Lubrication
Proper lubrication ensures smooth movement of the jaws and prevents rust or wear. Over time, parts of the chuck can wear down due to constant use, so regular lubrication is key to keeping everything in good working condition.
How to Lubricate: Apply a light machine oil or lubricant to the moving parts, including the jaw slides and the chuck’s body. Avoid over-lubricating, as excess oil can attract dust and debris.
Check the Lubrication Regularly: Ensure that the chuck is lubricated according to the manufacturer's instructions to avoid any operational issues.
3. Jaw Inspection
Inspect the jaws frequently for signs of wear or damage. Worn or damaged jaws can cause the chuck to grip improperly or damage the workpiece.
Check for: Uneven jaw surfaces, cracks, or chips. If any issues are found, replace the jaws or have them serviced.
Proper Jaw Alignment: Ensure the jaws are always aligned correctly. Misalignment can lead to poor clamping force or affect the accuracy of machining.
4. Chuck Calibration
Over time, the chuck may lose its precise centering ability due to wear. It’s important to recalibrate the chuck periodically to ensure it continues to grip workpieces accurately.
5. Storing the Chuck Properly
When the chuck is not in use, store it in a clean, dry place to prevent rust and damage. Keep it in a protective case or cover to shield it from dust, moisture, or accidental knocks.
4-Jaw Chuck Safety Considerations
1. Proper Mounting
Before operating a 4-jaw chuck, ensure that it is securely mounted on the lathe. An improperly mounted chuck can come loose during operation, leading to accidents or damage to the workpiece.
Check Tightness: Ensure the chuck is tightened securely to the lathe’s spindle.
Locking Mechanism: If your chuck has a locking mechanism, make sure it’s engaged before operation.
2. Workpiece Securement
Always double-check that the workpiece is properly secured in the chuck before starting the lathe. A loose or improperly positioned workpiece can cause it to fly out or wobble, leading to injury or damage.
Check Jaws: Ensure the jaws are evenly gripping the workpiece.
Use Proper Force: Avoid over-tightening the jaws, as it can damage the part or the chuck. Tighten the jaws enough to hold the workpiece securely without excessive force.
3. Wearing Protective Gear
Machining operations can involve flying debris, sharp edges, and moving parts, so always wear appropriate personal protective equipment (PPE).
4. Avoiding Overloading
Never attempt to machine a workpiece that exceeds the chuck’s rated capacity. Overloading the chuck can lead to breakage, inaccurate machining, and possible damage to both the workpiece and machine.
5. Keep Hands and Tools Clear
Always keep your hands and any tools clear of the rotating chuck and workpiece while the lathe is in operation. Ensure you’re following proper procedures when adjusting the jaws or workpiece, and never reach into the chuck area while the machine is running.
6. Monitoring for Vibration
Excessive vibration during operation may indicate that the workpiece is not securely held or the chuck is malfunctioning. Stop the machine immediately and inspect the chuck and workpiece for any issues.
Summary
Maintaining your 4-jaw chuck involves regular cleaning, lubrication, jaw inspection, and calibration to ensure smooth, precise operation. For safety, always ensure the chuck is properly mounted and the workpiece is securely held. Additionally, wear appropriate PPE, avoid overloading, and maintain good safety habits to prevent accidents. By following these guidelines, you’ll ensure your chuck stays in good condition and operates safely and effectively.
Conclusion: Why a 4 Jaw Chuck is an Essential Tool for Machinists
A 4 jaw chuck is an indispensable tool for machinists who need precision, flexibility, and versatility in their work. Whether you’re dealing with irregularly shaped parts or performing complex off-center turning tasks, the 4 jaw chuck offers the control and accuracy required for high-quality results. By following proper setup and maintenance practices, you can ensure the longevity and performance of this essential tool.


